demo
Pi Platform Demo app: Deployment Guide
Warning: The purpose of this project is to be simple to run, with very few configuration steps. There is no intent to make it 100% secure, infinitely scalable, or suitable for a live production app handling real Pi on the mainnet. Use it at your own risk and customize it as needed to improve security and scalability.
The production deployment uses docker-compose, and needs to run 4 containers:
- reverse-proxy: a simple nginx setup to reverse-proxy requests to the frontend and backend containers
- backend: the backend app (a very simple JSON API built using Node)
- mongo: the database (uses an extremely simple single-instance MongoDB setup)
- frontend: the SPA frontend app (built using React and create-react-app)
Setup steps
The following setup process was tested on Ubuntu Server 22.04.1. You may need to adapt it to your own needs depending on your distro (specifically, the “Install Docker” step).
It assumes you’re running as root. If that’s not the case, prepend all commands with sudo or start
a root shell with sudo bash.
1. Install Docker and docker-compose:
Run the following command in order to get the latest docker version and the latest docker-compose version (required because of this issue)
apt-get update && \
apt-get install -y zip apt-transport-https ca-certificates curl gnupg-agent software-properties-common && \
curl -fsSL https://download.docker.com/linux/ubuntu/gpg | apt-key add - && \
add-apt-repository "deb [arch=amd64] https://download.docker.com/linux/ubuntu $(lsb_release -cs) stable" && \
apt-get update && \
apt-get install -y docker-ce docker-ce-cli containerd.io && \
curl -L "https://github.com/docker/compose/releases/download/1.27.4/docker-compose-$(uname -s)-$(uname -m)" -o /usr/local/bin/docker-compose && \
chmod +x /usr/local/bin/docker-compose
2. Get a server and set up your DNS
Obtain a domain name and set up 2 DNS records pointing to your server. One will be used for the frontend app, and one will be used for the backend app.
Here is an example, assuming your domain name is mydemoapp.com and your server IP is 123.123.123.123.
A   mydemoapp.com           123.123.123.123
A   backend.mydemoapp.com   123.123.123.123
3. Register your app on the developer portal
Open develop.pi in the Pi Browser, on your mobile phone, and go through the prerequisite steps
(e.g verifying your email address).
Two options here:
- if you already have a development app set up, you can reuse it here (see the development guide)
- if you’re setting things up for the first time, you can create a new app by clicking the “Register An App” button.
Register an App:
- Name: The name of your app
- Description: A public user-facing description of your app
This will bring you to the App Dashboard, from this screen you can continue the setup of the demo app for deployment.
- App Checklist: Complete Steps 6-9 to prepare the app for deployment
- Step 6: Deploy the App to the Production Environment - Add the Production URL
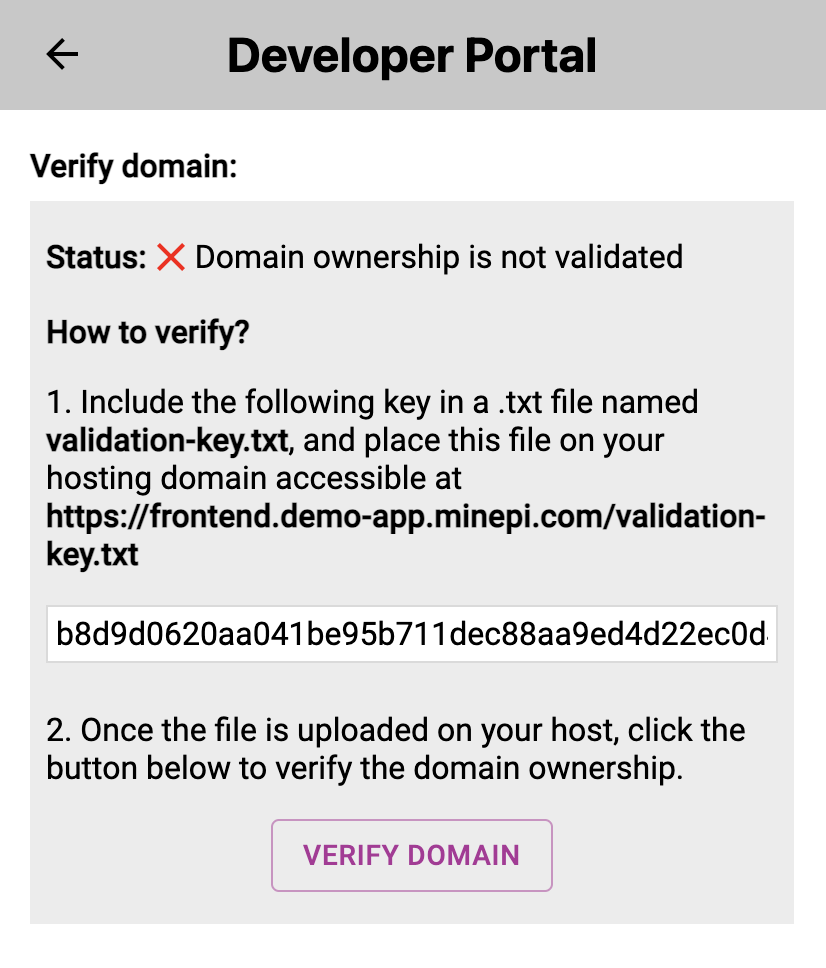
- Step 7: Verify Domain Ownership - Add the string supplied in this step to your .env file. This is deailed in step 4 of this list.
- Step 8: Process a transaction - Visit your app in the Pi Browser and complete a payment

- App Configuration: Additional information that can be adjusted
- Whitelisted usernames: you can leave this blank at this point
- Hosting type: select “Self hosted”
- App URL: Enter the intended production URL of your app (e.g “https://mydemoapp.com”), or simply set it up to an example value (e.g “https://example.com”). This must be an HTTPs URL.
- Development URL: This is irrelevant for deployment.
4. Set up environment variables (1/3)
Create a .env config file in order to enable docker-compose to pick up your environmnent variables:
# Move to the app's directory:
cd platform-demo-app

# Create .env from the starter template:
cp .env.example .env

# Edit the resulting file:
vi .env
# or:
nano .env
Set up the following environment variables. Using the example above:
FRONTEND_URL=https://mydemoapp.com
FRONTEND_DOMAIN_NAME=mydemoapp.com
BACKEND_URL=https://backend.mydemoapp.com
BACKEND_DOMAIN_NAME=backend.mydemoapp.com
5. Set up environment variables (2/3)
Obtain the following values from the developer portal:
Domain Verification Key: Go to the developer portal, and on your list of registered apps click on the app you are verifying. Next click on the “App Checklist” and click on step 7. From this page you can obtain the string that needs added to your .env file.

API key: obtained by tapping the “API Key” button on the App Dashboard

Then, copy-paste those values in the following two keys of your .env file:
# Add your Domain Validation Key here:
DOMAIN_VALIDATION_KEY=

# Add your API key here:
PI_API_KEY=
6. Set up environment variables (3/3)
Configure the following environment variables:
# Generate a secure password for your MongoDB database and paste it here:
MONGODB_PASSWORD=

# Generate a random string (e.g 64 alphanumeric characters) and paste it here:
SESSION_SECRET=
7. Run the docker containers:
Make sure you are in the platform-demo-app directory before running any docker-compose command!
docker-compose build
docker-compose up -d
You can check which containers are running using either one of the following two commands:
docker ps
docker-compose ps
You can print out logs of the Docker containers using the following command:
docker-compose logs -f <service-name>

# e.g:
docker-compose logs -f reverse-proxy
8. Verify Domain Ownership
Go to the developer portal, and on your list of registered apps click on the app you are verifying. While the app is deployed, click on the “Verify Domain” button. This should verify your frontend domain and mark it as verified (green check mark on the developer portal).

9. Open your app in the Pi Browser and make sure it worked:
Open your frontend app’s URL in the developer portal and make sure everything works by signing it and placing an order, then proceeding with the payment (you will need a testnet wallet in order to complete this step).
